Hi again.
How can I tell if my hard drive is dead, and are there any chances of recovering data from it?
Data Recovery from a “Dead Drive”: Diagnostics and Solutions
To determine if it’s possible to recover data from a “dead drive” and how to do it, we need to analyze the symptoms of such drives to develop the right strategy for potentially recovering your data.
What External Factors Can Cause Fatal Damage to Your Drive?
Impacts, moisture, and heat can lead to serious hard drive failures. Water and high temperatures can physically damage the electronic components. Additionally, dropping the computer or the drive, or a sudden impact, can damage its internal parts, leading to complete failure of the hard drive.
The mechanical components of hard drives are susceptible to wear and tear. With regular use, the internal mechanisms of the device can fail. If the read/write heads of your hard drive become weak or fail over time, it will no longer be able to properly process or store data.
Main Symptoms of “Dead Drives” and How to Diagnose Them:
- No Activity When Connecting the Drive to a Computer
When you connect the drive to your computer, the drive shows no signs of activity (the platters don’t spin, there are no vibrations or noises, except for possible heating). Common causes include issues with the PCB or mechanical problems, such as stuck heads or a seized motor spindle.
Other possible causes include a blown fuse or TVS diode, which protect the hard drive from voltage spikes.
Possible Solutions:
a) Check the power supply and connection cables. Try using a different SATA port, docking station, or power supply.
b) For external drives, try removing the drive from its USB enclosure using guides from YouTube or specialized sites like iFixit, Tom’s Hardware, or Reddit. Be aware that some drives with built-in USB interfaces might require professional help due to hardware encryption.
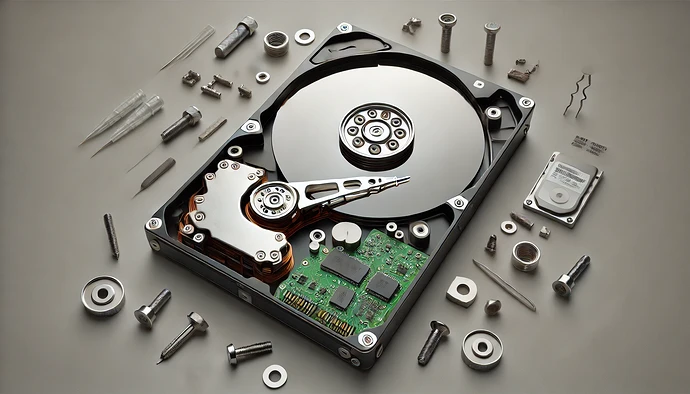
Warning: Never attempt to open or disassemble the HDD itself, as this could cause further damage and result in irreversible data loss.
- Unusual Noises Coming from the Drive
If the drive makes clicking, grinding, beeping, loud rattling, strong vibrations, or other abnormal sounds, it could indicate mechanical problems with the heads, motor, or platters. Sometimes, clicking sounds can be caused by firmware errors or issues with the VCM&SM controller chip.
These noises may signal that the internal mechanisms of the hard drive have already failed or are about to fail. Continuing to use the drive without addressing these issues could lead to irreversible data damage.
- The Computer Freezes or Restarts When Connecting the Drive
This symptom doesn’t always indicate a “dead drive,” but very often, working with such drives requires specialized hardware for low-level access in service mode to copy data from these drives.
Freezing or restarting could indicate file system issues or internal component problems, and these often cannot be resolved without professional help.
- Visual Inspection of the Drive
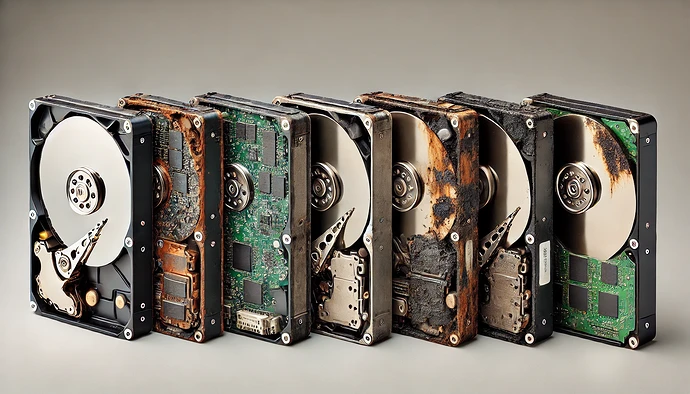
During a visual inspection of the drive, look for any signs of casing or PCB deformation, corroded contacts, burnt or discolored components, signs of corrosion, dirt and soot marks, or a burnt smell.
All of these may indicate severe damage requiring professional help for data recovery.
If visible damage is found, attempts to recover data yourself could result in irretrievable data loss.
- DIY Diagnosis of Electronic Components:
If you have a multimeter, check the 5V and 12V circuits for short circuits. Also, check the motor coil resistance. If you have an identical working drive (same manufacturer, model series, and PCB revision), compare the resistance of the pins in the switch connector. Significant differences may indicate a faulty preamplifier, which would require halting further DIY recovery attempts.
What is a PCB? PCB (Printed Circuit Board) is the board where all the electronic components that control the hard drive are located. If this board is damaged, the drive may stop functioning.
What is a TVS Diode? A TVS (Transient Voltage Suppression) diode is a component that protects electronic devices from sudden voltage spikes. If the TVS diode burns out due to a voltage spike, the drive may stop working.
You can find information on your specific HDD model on websites like Datasheet Archive, BadCaps, HDDGuru, GitHub, and Reddit.
- Software Diagnostics
a) Connect the HDD to your computer and check its status in the BIOS (for Windows PCs), then in Computer Management after Windows fully boots, or in system information.app / Disk Utility for macOS.
If the HDD displays incorrect details, such as showing only the model name and zero capacity, or if the model name differs from what is expected, or if the serial number is missing, this indicates that the initialization failed, and there are firmware issues. In such cases, fixing the problem without specialized equipment and software is usually impossible.
A significant increase in operating system boot time when the suspicious hard drive is connected is a clear sign that there may be defects on the platter surfaces. These delays occur due to the firmware attempting to interact with damaged sectors and conducting offline scans, which it cannot complete.
b) Take a screenshot of your drive’s SMART data, which can be obtained using many programs, such as:
- Windows – CrystalDiskInfo, DiskDrill, R-Studio, AIDA64
- Mac – DiskDrill, DriveDX, R-Studio, SMART Utility
Ask ChatGPT (or any other AI tool you’re comfortable with):
“Provide the disk’s technical specifications, including speed, form factor, interface, recording type (SMR or CMR), and support for TRIM and encryption. Analyze the SMART data from the screenshot with a table showing current, worst, threshold, and RAW values. Highlight and explain deviations, focusing on critical parameters (05, 184, 187, 196, 197, 198, 199, 200). Assess overall disk health, emphasizing problematic indicators. Compare these data with the manufacturer’s specifications, noting any discrepancies in size, transfer rate, or other parameters. Identify likely causes and solutions. Research common problems for this HDD model using historical data and user reports from professional forums. Include links to relevant discussions and user experiences. Provide specific recommendations, including immediate actions and preventive measures. Search online and provide links to similar issues encountered by other users with this model or similar drives.”
Receive a detailed response from the AI, focusing on the in-depth SMART Data Analysis and Common Problems specific to your drive model. Proper assessment of the HDD’s condition and recommendations based on the AI’s response and linked forums will help you decide on further actions: either to take the drive to a professional lab or proceed with DIY recovery if the drive’s condition allows.
- Creating a Byte-to-Byte Backup
If you determine that the drive can be recovered with DIY software, the next crucial step is creating a byte-to-byte backup of the drive.
For drives with a large number of bad blocks, it’s recommended to use HDDSuperClone on Linux. You can create a bootable disk, boot from it, and create a copy of the damaged drive as a file on another storage device. Like most Linux solutions, HDDSuperClone requires a solid understanding and careful reading of the documentation.
On Windows, the optimal options are Disk Drill or R-Studio.
For macOS, the best choice is Disk Drill, which uses low-level access to ioKit, allowing you to create an accurate disk image even with a large number of bad blocks.
Important: Creating a byte-to-byte backup can take a long time and depends on the condition of the drive and the number of bad blocks. Professional data recovery software uses a multi-pass backup method, where bad blocks and adjacent areas are skipped in the first pass to speed up the process, and then re-scanned in the second pass. This method speeds up data retrieval from areas of the disk with bad blocks and unstable blocks, which are analyzed through multiple reads during the second backup phase. Note that some software requires a specialized technical license for multi-pass scanning.
- Main Stage of Data Recovery
After copying the original drive, disconnect it from the computer, and connect the image to DIY data recovery software. Use the software to scan the image and recover the files.
After analyzing the recovery results, do not rush to delete the byte-to-byte image, as the integrity of the recovered files should be carefully checked: videos should play and allow fast-forwarding, and photos should be opened not only in the standard Windows/macOS viewer but also in a graphic editor, as many professional formats like Canon RAW contain several files within (a preview, icon, high-resolution preview, and the RAW file itself), whose integrity can only be verified by opening it in RAW photo editing software.
This stage requires particular attention, as any mistakes in the verification process could result in the loss of data that might have been recoverable. If the recovery process seems too complex or the data is critical, consider contacting a professional lab for assistance.

