My brother’s laptop has a failed motherboard, as we were told at the service center. It has been in use for several years, and there’s no point in repairing it. However, I need to retrieve many family photos and all the university documents from it. How can I do this?
If your laptop crashes and you want to recover data from its internal SSD, then the procedure will be as follows:
1. Determining whether you can remove an SSD drive from a laptop
Look for information about your laptop model on the manufacturer’s website or on popular forums about the possibility of removing/replacing the SSD drive.
Some laptop models, for example most Apple models, starting from 2016 and some models of modern laptops from different manufacturers do not have the ability to remove the SSD drive, since it is soldered to the motherboard and requires qualified removal or direct connection to the chips, which is only available in professional data recovery laboratories.
Examples of such laptops: Dell XPS 13, Dell XPS 15, Microsoft Surface Laptop, Microsoft Surface Pro X, Lenovo Yoga, Lenovo ThinkPad X1 Carbon, HP Specter x360, HP Envy, ASUS ZenBook, ASUS ROG Zephyrus, Acer Swift, Huawei MateBook X Pro etc. (some of the above models have exceptions with removable SSD drives).
So, if your laptop has a soldered SSD, contact professionals for help, you will not be able to extract data from them yourself.
2. Determining the model and interface of your SSD.
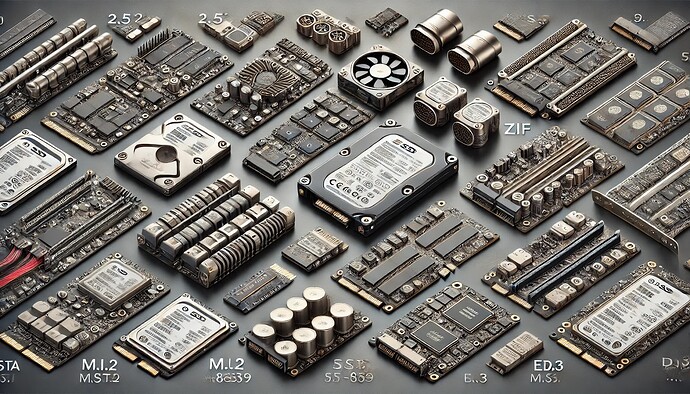
Even before disassembling the laptop or after it, you will be faced with the need to subsequently connect your SSD to restore data to a working computer, for this you need to find out which form factor and interface connection has your SSD. The main options common in laptops are 2.5-inch SSD, M.2, PCIe, mSATA, SFF-8639, ZIF (Zero Insertion Force), SAS (Serial Attached SCSI), CFast, U.3, M.3, E1. S and E1.L (EDSFF), E3.S and E3.L (EDSFF), DOM (Disk on Module).
Based on the interface and form factor of your SSD drive, you may need an appropriate adapter to connect to another computer (the most common options are USB-SATA, USB-M.2).
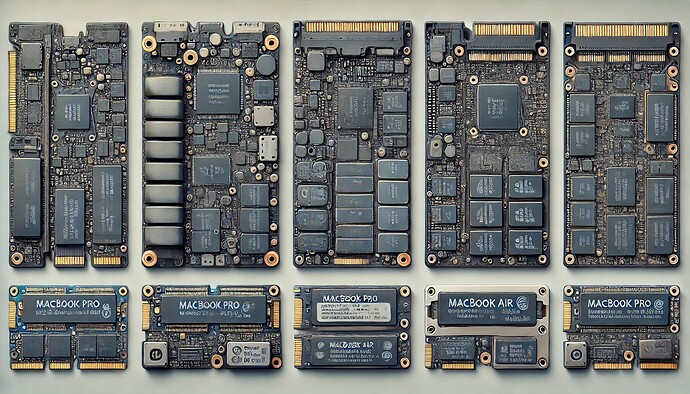
For Apple laptops the situation is slightly different due to proprietary connectors, for example the following models:
MacBook Pro (Retina, 15-inch, Mid 2012 - Mid 2015)
MacBook Pro (Retina, 13-inch, Late 2012 - Early 2015)
MacBook Air (11-inch, Mid 2012 - Early 2015)
MacBook Air (13-inch, Mid 2012 - Early 2017)
We used proprietary SSDs that are not compatible with regular M.2 or other standard SSD interfaces. To connect their SSD to another computer you will need special adapters:
- Aukey Portable USB 3.0 to PCIe Adapter
- Sintech M.2 NGFF SSD Adapter
- OWC Envoy Pro
- JVJ USB 3.0 to MacBook SSD Enclosure
3. Analysis and extraction of the SSD from the laptop.
Look for instructions or a video review on disassembling your laptop model on resources that specialize in this issue: iFixit (iFixit), Notebookcheck (Notebookcheck), Laptop Mag (Laptop Mag), Tom’s Hardware (Tom’s Hardware), YouTube (YouTube), TechRepublic (TechRepublic).
Based on the instructions and reviews, carefully determine the tools necessary to disassemble and remove the SSD and do not forget about protection against static electricity: when disassembling a laptop, you should take several precautions: Wear an antistatic wrist strap and connect it to a grounded surface. This will prevent static electricity from building up on your body, use an anti-static mat to place your laptop and tools on it. Connect the mat to ground. Make sure that the laptop is completely disconnected from the power source and the battery is removed (if possible) before starting work. Avoid touching contacts and circuit boards on components. Hold parts by the edges or where they are intended for installation. Before starting work, touching a grounded metal object will help remove static charge from your body.
4. Connecting to a computer and diagnosing an SSD drive.
After you have connected your SSD drive from a broken laptop, you need to follow some steps to diagnose the condition of the solid state drive.
Launch Disk Drill for win or mac and go to the SMART tab to check the status and wear level of the SSD.
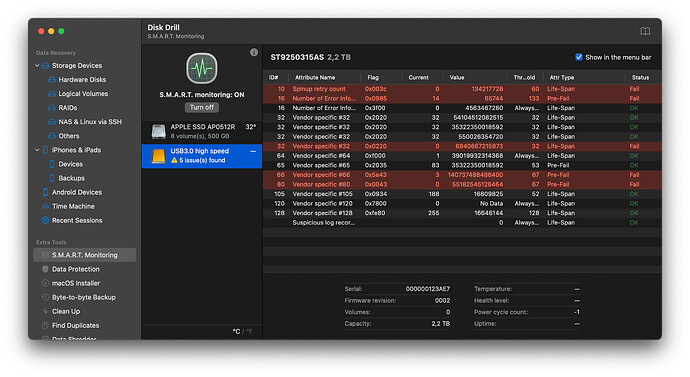
An example of a problem disk that requires attention professional laboratory due to a firmware error:
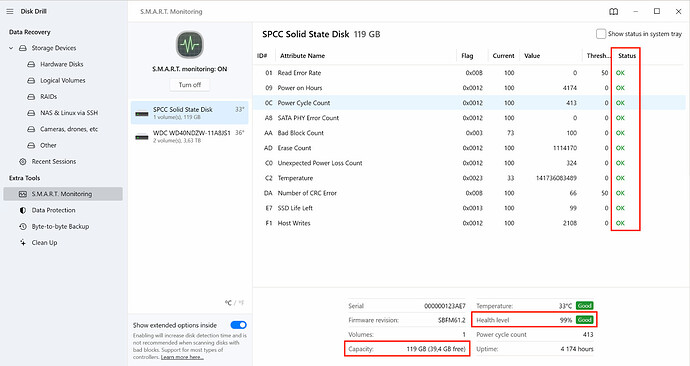
An example of a good SSD drive, data from which can be copied without problems:
Status for all parameters SMART – OK, Health level – Good, Capacity is determined correctly and corresponds to the size of your SSD.
If any of the SMART parameters have a caution or bad status, it is recommended to byte-to-byte backup into the image and restore files from the resulting image.
5. Possible difficulties when accessing files on an SSD drive
a) Data encryption: If the drive is encrypted (for example, using BitLocker on Windows or FileVault on macOS), you will need the appropriate encryption key or password to access the data.
For Windows, the bitlocker key can be accessed via recovery keys page.
For macOS - through the keychain in icloud.com or in the “Passwords” section on the ios/macos device associated with this appleID account.
b) Permissions for files and folders: NTFS/HFS/APFS can restrict access to files and folders if you are not the “owner” of them from the system’s point of view.
Instructions for changing access rights for Windows
Instructions for changing access rights for macOS
c) Unknown file system
If the file system of your broken laptop was different from the file system of the working computer (for example, the laptop was on Linux or Apple, and you connected the SSD to a Windows machine).
Here is a list of programs for accessing disks with non-native ext4/HFS/APFS file systems on Windows:
-
Paragon ExtFS for Windows: Paragon ExtFS for Windows
-
Linux File Systems for Windows by Paragon Software: Linux File Systems for Windows
-
ExtFS for Mac by Paragon Software: Paragon ExtFS for Mac
-
Mounty for NTFS (macOS): Mounty for NTFS
-
Paragon HFS+ for Windows: Paragon HFS+ for Windows
-
Paragon APFS for Windows: Paragon APFS for Windows
-
MacDrive by Mediafour: MacDrive
As an alternative, you can scan the disk in a data recovery program: no matter what file system was on the SSD, data recovery programs will show you files from any file system.
d) Recovery from Chromebooks
The SSD from a Chromebook will most likely be encrypted, because ChromeOS uses ext4 with encryption dm-crypt.
The easiest decryption option is to use another chromebook with the same credentials as on the removed SSD.
6. If you are unable to recover data from the ejected disk yourself, please contact professionals.
Do not rush to delete data from the old SSD or reformat it; very often there are situations when after a while you remember that there was a necessary file somewhere that you forgot to copy, or some of the copied data was destroyed.


