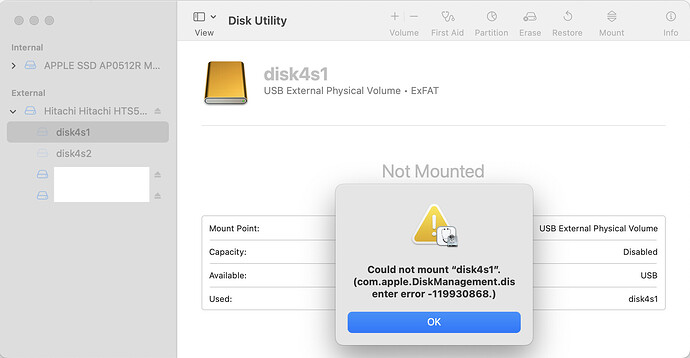
Hi everyone, I’m having an issue with my external hard drive where I store my footage. Finder stopped showing 2 out of 4 partitions and says there’s a mounting error. I have tight deadlines for editing and I don’t know what to do. Please help.
One common issue encountered by Mac and Windows users is when an external drive isn’t visible, doesn’t mount, and its data is inaccessible. Let’s break down this problem and explore the steps for diagnosing and recovering data in such cases.
Diagnosing the Problem
Ensure there are no hardware issues with the drive’s power, USB cables, USB port, or the computer’s USB port. To verify this, try connecting the drive with a different USB cable to a different USB port on another computer. Check at each stage if the computer detects the drive. If the drive does not appear in Computer Management (Windows) or Disk Utility (Mac), contact a specialist, as there may be no DIY solutions available.
Disks to Pay Special Attention To:
Certain types of disks are particularly complex when it comes to repair or data recovery. Here’s a detailed look at why these disks require special attention:
- Helium-filled Drives: These drives are designed to have higher storage capacities and lower power consumption due to the use of helium, which reduces friction. However, their sealed environment makes them difficult to repair. If the seal is broken, the drive can be compromised, making data recovery challenging and requiring specialized equipment.
- SMR (Shingled Magnetic Recording) Drives: SMR drives increase data density by overlapping tracks, similar to shingles on a roof. While this allows for greater storage capacity, it also makes data recovery more complex. The overlapping tracks can cause slower write speeds and complications during the data recovery process, as traditional recovery methods may not be effective.
- Drives with Hardware Encryption: These drives provide enhanced security by encrypting data at the hardware level. While this is beneficial for protecting sensitive information, it complicates data recovery. Without the correct encryption key or method, accessing the data can be nearly impossible. Specialized tools and techniques are often required to recover data from these drives.
- Hybrid Drives (SSHDs): Hybrid drives combine a traditional HDD with a small amount of SSD storage to improve performance. The dual nature of these drives can complicate data recovery, as both the SSD and HDD components need to be addressed. Specialized knowledge and tools are necessary to handle the unique challenges presented by hybrid drives.
- RAID Arrays: While not a single drive, RAID (Redundant Array of Independent Disks) systems use multiple drives to improve performance and provide redundancy. Recovering data from RAID arrays can be particularly complex, especially if multiple drives fail or if the RAID configuration is corrupted. Professional expertise is often required to rebuild the array and recover the data.
- Intel Optane Drives: Intel Optane drives use a unique 3D XPoint memory technology that provides high-speed performance and low latency. While they offer significant performance advantages, their unique architecture can complicate data recovery. Standard SSD recovery techniques may not be applicable, and specialized tools and knowledge are often required to handle the recovery of data from Optane drives.
Checking the Drive’s Capacity and Properties
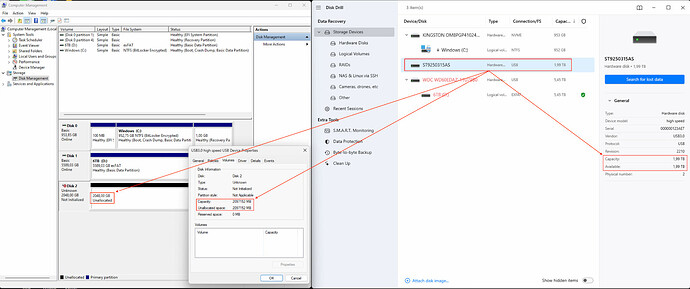
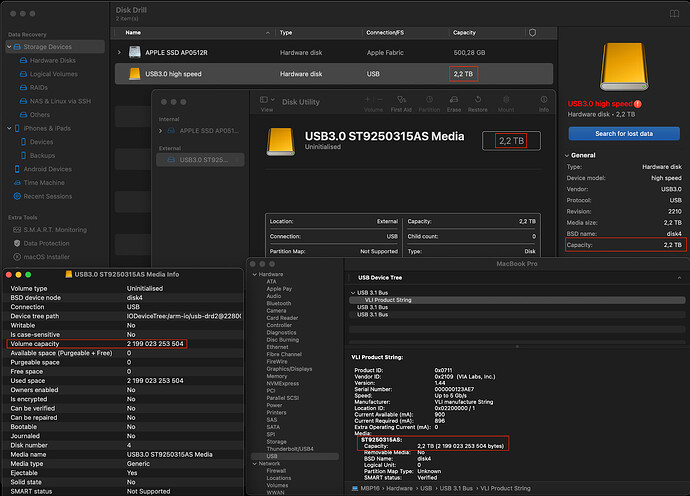
Using a Seagate Momentus 5400.6 ST9250315AS 250GB drive as an example, you might see the following:
-
On a Windows computer in Computer Management, the drive’s capacity might be determined as 2TB with a status of “Unknown 2048.0GB Not Initialized.”
-
On macOS, the same drive might be detected with a capacity of 2.2TB, due to different unit measurements used by these operating systems.
This behavior is often due to damaged firmware or controller errors. In such cases, further DIY data recovery options are not available, and professional help is recommended. This issue is well-known in labs and generally has a high chance of data recovery.
External Symptoms of a Damaged Drive:
- Clicks: Periodic or constant clicking may indicate mechanical problems with the read/write heads.
- Scratching: Scratching or grinding sounds may indicate damage to the disk surface or mechanical parts.
- Buzzing or Vibrations: Improper motor operation may cause unusual buzzing or vibrations.
- Constant Restarting: The drive may attempt to restart constantly, accompanied by corresponding on/off sounds.
These symptoms suggest mechanical or electronic issues that require professional assistance.
Checking and Interpreting the Drive’s SMART Status
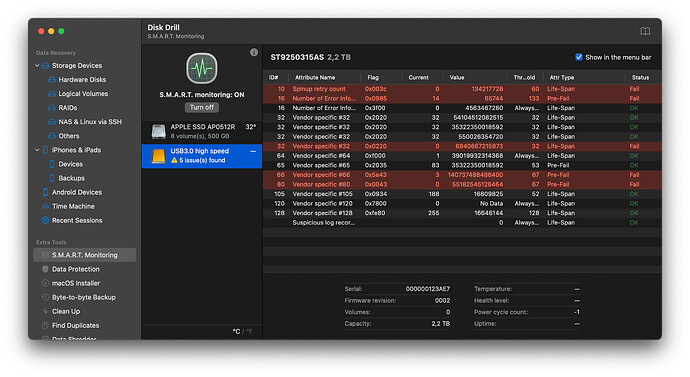
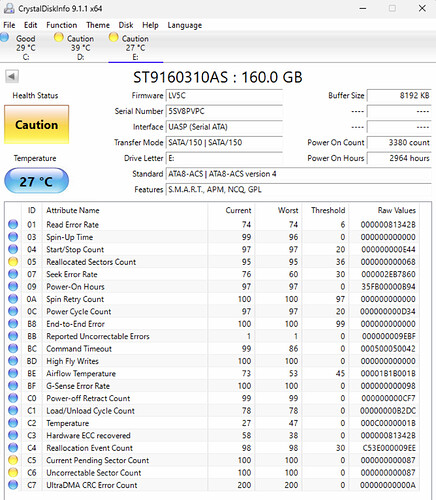
Using the same drive as an example, you can effectively analyze SMART parameters with AI services. Here’s how to proceed:
- Take a screenshot of your drive’s SMART data, obtainable from many programs, such as:
- Windows:
- Mac:
-
Ask an AI service (e.g., ChatGPT) to provide a detailed analysis of the SMART data. Request an analysis that includes:
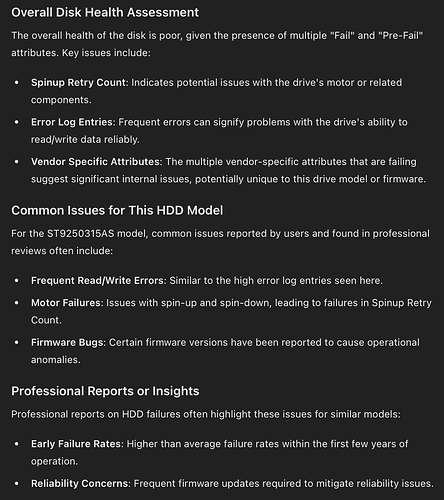
“Indicate in detail all the technical characteristics of this disk, speed, form factor, interface the recording type SMR or CMR, whether this disk supports trim and encryption. Please analyze the attached SMART data screenshot and provide a detailed problem table considering the following points: List all SMART parameters, including current, worst, threshold, and RAW values. Bold any problematic parameters. Provide explanations for each parameter, especially highlighting deviations from normal values in the table. Focus on their significance and potential issues. Explicitly highlight any critical parameters that are close to or exceed their threshold values, especially 05, 184, 187, 196, 197, 198, 199 and 200. Offer a comprehensive assessment of the overall disk health, considering both normalized and RAW values. Underline and highlight all problematic indicators in the table. Identify common problems specific to this HDD model based on historical data and user reports from professional forums. Include professional reports or insights, as well as links to relevant discussions and user experiences on forums like Reddit and the manufacturer’s community forums. Add links to typical problems with this disk model. Provide specific recommendations based on the analysis, including immediate actions and preventive measures to safeguard data. Search the internet and provide links to similar problems encountered by other users with this disk model or similar models”The result of the AI analysis for this disk will be as follows:
Here is an example of an old HDD with a long operating time and minor problems with bad blocks, the data from which can still be recovered using DIY data recovery software, looks like this:
Overall Disk Health Assessment
The state of this disk is questionable due to several parameters indicating potential issues:
- Reallocated Sectors Count (ID 05): The current value of 95 is above the threshold of 36, which is good, but the RAW value of 104 reallocated sectors is concerning. This indicates the disk surface is deteriorating.
- Reported Uncorrectable Errors (ID BB): The current value is 1, which is close to the threshold, and the RAW value shows 93,899 uncorrectable errors. This is a significant issue and suggests serious data integrity problems.
- Hardware ECC Recovered (ID C3): The current value of 58 and the RAW value indicate a high number of errors corrected by the hardware, pointing to potential disk surface problems.
- Current Pending Sector Count (ID C5) and Uncorrectable Sector Count (ID C6): Both attributes indicate 87 sectors are pending reallocation or uncorrectable, which is a serious warning sign.
Conclusion by Ai:
The ST9160310AS 160 GB hard drive shows significant signs of wear and potential failure, especially with a high number of reallocated and uncorrectable sectors. Immediate backup of important data and continuous monitoring are strongly recommended. Engaging in specialized forums and following professional advice can provide additional support and tips for managing and mitigating these issues.
Naturally, it’s not advisable to trust the AI report 100%, as it can make mistakes. However, the general conclusions and links to specialized forums regarding your disk problems, along with information from professional laboratories in the report, can be analyzed independently. It is important to pay attention to the interpretation of the RAW SMART data of the disk, as these raw indicators and their decoding for the specific disk vendor can provide more information about the potential problem with the disk.
Examples of Key RAW Data Attributes
- Reallocated Sector Count (ID 05): Displays the number of reallocated sectors. A high value indicates the presence of bad sectors on the disk.
- Power-On Hours (ID 09): The number of hours the disk has been in operation. This helps to assess how long the disk has been used.
- Reported Uncorrectable Errors (ID BB): The number of uncorrectable read/write errors. High values may indicate serious problems with the disk.
- Temperature (ID C2): The temperature of the disk. High temperatures can shorten the lifespan of the disk.
- Current Pending Sector Count (ID C5): The number of sectors pending reallocation. A high value may indicate potential problems with data read/write operations.
RAW data is an important tool for ensuring reliable operation and longevity of storage devices, providing a deep analysis of disk health and helping to predict possible failures.
Creating a Byte-to-Byte Backup of the Disk
Creating a byte-to-byte backup is a crucial step whenever data loss occurs. This provides an immutable snapshot of the data, allowing further recovery operations to be performed on it. The problematic disk should then be disconnected and not used until successful data recovery from the image.
-
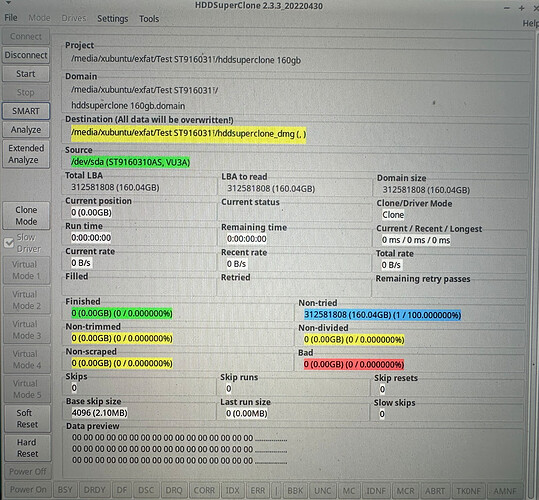
For disks with many bad blocks, use HDDSuperClone on Linux. Create a bootable disk, boot from it, and create a copy of the bad disk to a file on another drive. This process requires fundamental knowledge and careful reading of the documentation.
-
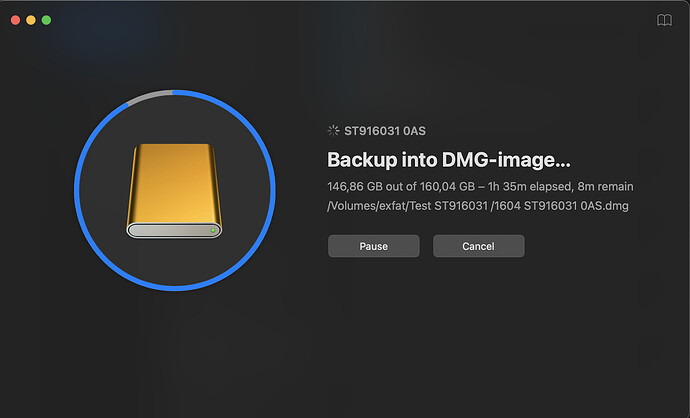
For MacOS/Windows, use Disk Drill. Disk Drill uses low-level access to IOkit on macOS and Windows API functions like DeviceIoControl on Windows, allowing accurate imaging of the disk even with many bad blocks.
Note: Creating a byte-to-byte backup can take a long time, depending on the disk’s state and the number of bad blocks. Professional data recovery software uses a multi-pass backup method where bad blocks and adjacent areas are skipped initially to speed up the process. Subsequent passes repeatedly scan bad sectors, which helps retrieve data from problematic areas. Some software requires a specialized technical license for multi-pass scanning.
Usually, disk backup with bad blocks occurs in two stages: in the first stage, Disk Drill skips the bad blocks on the disk and the areas nearby to speed up the process and create a disk image. The second stage involves reading all the skipped areas with bad blocks multiple times, trying to read data from the slow read sectors. In the second stage, you can assess the time and necessity of recovering such sectors yourself. If their number is small relative to the total size of the disk and the time indicated by the program until completion is very long, you can interrupt this stage. For bad disks, it is acceptable that the disk disconnects during the backup process. If the disk reconnects itself (the controller resets), Disk Drill will continue the backup automatically without your intervention, but sometimes disks can “hang” and require manual power cycling.
Monitor the byte-to-byte backup process and prevent the disk from overheating (for example, forced cooling with a fan or placement under an air conditioner will improve and speed up the process).
Final Stage of Data Recovery
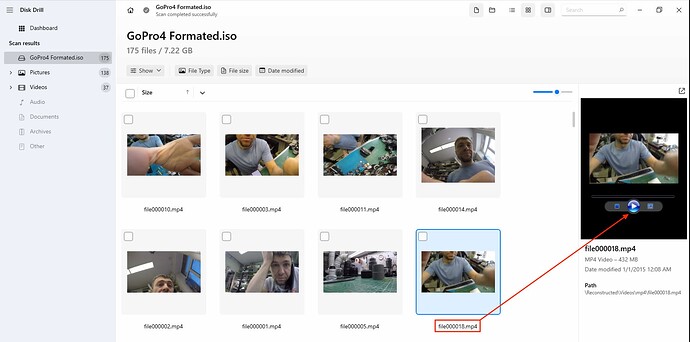
Once the source disk is copied and disconnected, attach the image to DIY data recovery software and scan the data. After analyzing the recovery results, verify the integrity of recovered files: videos should play correctly, and photos should open not only in the standard viewer for Win/Mac but also in a graphics editor. This is important for formats like Canon RAW, which contain multiple files inside.
If your system has a helper installed for previewing video files or documents (for example, on macOS you can easily view the contents of most MP4/MOV files, while on Windows you can view .WMV, MPEG, etc.), you will be able to check the accuracy of the recovery directly in the interface.
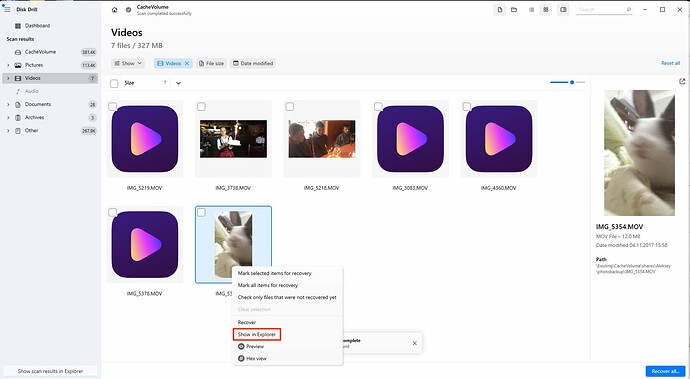
If the helpers are not installed (for example, 360-degree videos can only be viewed in certain software, and standard system viewers won’t display them), click on “Show in Explorer/Finder” and review the results in the standard file explorer/Finder, where you can open the recovered file in any program.
Good luck, and remember to follow the 3-2-1 backup rule to avoid future data loss: keep three copies of your data, store them on two different media, and have one copy offsite.
